 Photo credit IStock Photo.
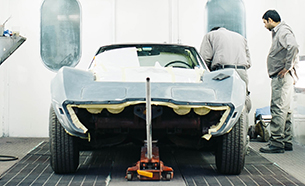
 This is an all in one coat! Duratec Polyester Surfacing Primer provides rapid coat build-up and a smooth surface with high gloss. Use it with composite plugs and patterns, and to prime a growing number of wood products–including furniture, musical instruments, and architectural applications.
1) Low Porosity - The Duratec Surfacing Primer provides a super-fine leveling and filling system on a variety of substrates with superior release properties.
2) Adhesion Versatility - With a heat distortion level of 201°F, this primer also adheres to fiberglass, properly prepared metal, wood, medium density fiberboard, brick, concrete, polyurethane foam, and most Epoxies.
3) Rapid Coat Build Up - Build to 40 mils, 1000 microns, wet on wet, on composite plugs, and master mold surfaces; this primer saves time and labor costs.
4) Easy Sanding - Save even more time and labor. It cures to a surface that will polish to a high gloss, when required.
| Product Properties |
| Viscosity - As measured on a Brookfield Viscometer Model RVF, Spindle #5 at 2.5 rpm. |
2700 CPS |
| Thixotropic Index |
5 |
| Gel Time - Sample based on a 100 g mass, catalyzed at 2 percent with MEKP |
16-18 min. |
| Weight per Gallon |
10.9 lbs |
| Volatile Organic Compounds |
199 g/l |
| Coverage per Gallon - 10 mil thickness |
110-115 sq ft |
Application Conditions
The surface should be clean, dry, and free from oil, grease, wax, or other contaminants. Ambient temperature should be in excess of 60°F, or 16°C, to ensure a rapid and complete cure. Time calculations are based on temperatures of 77°F.
Surface and Product Preparation
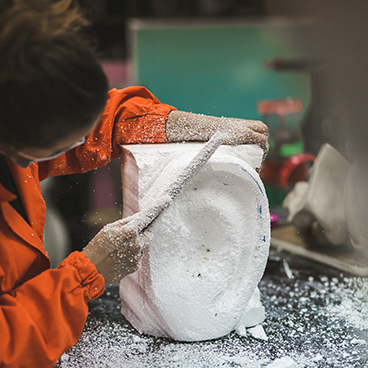 Photo credit IStock Photo.
Starting from a correctly shaped and dimensionally stable plug, sand the entire surface with a coarse sandpaper (80 to 120 grit), making sure to feather in puttied and filled areas. Wipe the sanded surface with a fast solvent and a clean white cloth or paper towel. Do not use a tack rag.
Thoroughly stir Duratec Polyester Surfacing Primer in the can prior to catalyzing. Due to the rapid gel time of the primer, mix only the amount that can be applied within 16 to 18 minutes. (Higher temperatures yield a shorter pot life and gel time, while lower temperatures yield a longer pot life and gel time). Catalyze at 2% with MEKP catalyst. Thin 10-30% with a fast acrylic lacquer thinner after catalyzation, if necessary, to achieve a desired spray viscosity.
| Item |
Description |
|
| Sandpaper |
Using consecutively finer grades of sandpaper on the surface of a part or mold will allow fabricators to create a class A finish with which to work. Fibre Glast sells packages of 5, 25, and 50 sheets each. |

|
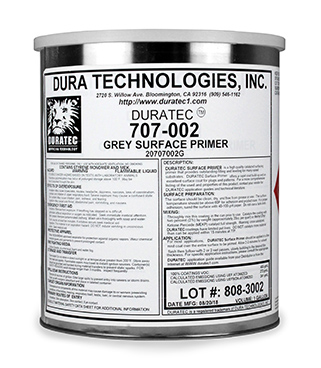
| Duratec Gray Surfacing Primer |
Remember, due to the rapid gel time of this primer, only mix the amount that can be applied within 16 to 18 minutes. |
|
| MEKP |
Methyl Ethyl Ketone Peroxide, or MEKP, is mixed with your surfacing primer in order for it to harden. Typically, Duratec polyester surfacing primer will require a mixture of 2% MEKP in order to catalyze. |
|
| Duratec Thinner |
Duratec thinner can be added to any Duratec product to enhance the flow and leveling properties of the material. |
|
Application Procedures
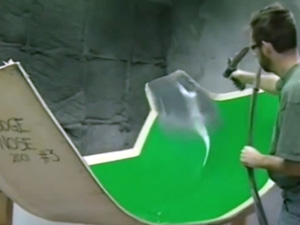 Photo credit IStock Photo.
 Note: Spray pressures should be 35 to 50 psi. If a pressure pot is used, provide 10 to 15 psi pot pressure.
Apply a "tack coat" to the entire surface and allow it to flash for 2 minutes. Follow with wet passes, slowly building to the desired thickness (10 to 40 mils). Heavier thickness can be achieved by repeating the process immediately after gel has occurred. The primer will be dry to the touch in 1 to 4 hours, depending on the thickness and temperature, and ready to sand within 24 hours. Dry sand the entire surface with 80 to 120 grit sandpaper. Wipe the surface with fast solvent and a clean white cloth or paper towel. Do not use a tack rag. Wait overnight for the solvent to release and a complete cure to develop. Again spray the primer as directed. If an even higher gloss is desired, blend the primer one-to-one with Duratec Polyester Clear Hi-Gloss Additive (#1040-B), thin with a fast acrylic lacquer thinner, and spray to the desired thickness following equipment directions. Sand to a 600-or-higher-grit finish. (Note: For best results, after sanding, wait overnight before compounding and polishing the surface.) Remove scratches with #1102 Polishing Compound and polish with #1103 Polishing Compound for a glossy swirl, mark-free finish. No surface cleaning is necessary prior to the application of release materials.
| Item |
Description |
|
| Duratec Polyester Clear Hi-Gloss Additive |
For projects that will require a higher gloss, mix your surfacing primer with Duratec Polyester clear hi-gloss additive at a 1:1 ratio. Hi-Gloss additive requires a 2% MEKP hardener. |
|
| Two step Mold Polish |
These two compounds work together in order to give parts an impressive polish after the sanding process. Each step comes in a 1 lb and 5 lb can. |
|
Frequently Asked Questions
Q: Can this primer be applied with a brush or roller?
A: Yes, but spraying will deliver a better finish.
Safety Precautions
Duratec Polyester Surfacing Primer is extremely flammable. Do not spray near sparks, open flame or heat. Keep area ventilated. Avoid continuous breathing of vapor or spray mist. Do not smoke while using this product or ingest this product. See SDS for more details.
| Troubleshooting Guide |
| Problem |
Cause |
Solution |
| Alligatoring |
Not enough catalyst used
Substrate/primer incompatibility Chemical reaction
Primer sprayed on cold surface
|
Check for proper catalyst levels
Check compatibility of surface and product
Expose surface to higher Temperature before spraying when Ambient temp is below 60°
|
| Blisters |
Substrate not cured, Gassing underneath primer |
Completely cure putties, pastes and compounds before applying primer |
| Cracking |
Primer spray too thickly, too fast |
Increase the number of passes, adding dwell time between coats. For exceptionally thick buildup, allow fore gel to occur before spraying further. |
| Dimples (craters) |
Film buildup too rapid, solvent trapped in primer. |
Increase the number of passes to achieve desired thickness. Allow for "flash off" between passes. |
| Dry over-spray |
Acetone used as thinner
Spray gun orifice too small.
Spray pressure too high.
|
Use slower solvent such as a fast acrylic lacquer thinner.
Use larger orifice.
Set line pressure at 35-50 psi.
|
| Fisheyes |
Substrate contaminated.
Contamination in the air
Contamination in the air line
|
Do not use a "tack rag", slow evaporating solvent
Spray in a clean area to minimize airborne dust, water, waxes, and/or silicones.
Spray with dry filtered air.
|
| Gelling in the Container |
Outdated product |
Replace with new primer |
| Lifting or Peeling |
Substrate not cured or substrate/primer incompatibility |
Completely cure putties, pastes, and compounds before applying primer. Check compatibility of surfaces and products. |
| Orange Peel |
Spray equipment set up incorrectly
Spray pressure incorrect
Pot pressure incorrect.
Viscosity too high
|
Follow the instructions for equipment set up.
Set pressure at 35-50 psi.
Set pressure at 10-12 psi.
Thin with fast acrylic lacquer thinner.
|
| Pattern surface sticks to mold upon release. |
Improper release preparation
Primer not fully cured before compounding and polishing
Excessive gel time for tooling gel coat.
|
Follow manufacturer's instructions when applying release materials.
Follow instructions above fore pattern surfacing.
Follow manufacturer's recommendations for gel time.
|
| Pinholes |
Substrate Porosity |
Fill porous areas with product using squeegee, brush or roller before spraying |
| Plug/Pattern surface not hard or glossy |
Primer not allowed to "breathe" after sanding.
Surface wet sanded when under cured; primer absorbed water.
Ambient temperature under 60° F when sprayed.
Low reactivity catalyst used.
|
Allow time for solvents to escape before compounding and polishing
Dry sand with initial sanding step. Wet sand after breathing occurs.
Expose surface to higher temperature before spraying.
Do not use a catalyst with less than 8.8 percent active oxygen.
|
| Plug/Pattern surface loses porosity |
Primer not fully cured prior to compounding and polishing.
Spray pressure too high
Spray orifice too small
Acetone used as a thinner
|
Dry sand with initial sanding step. Wet sand after "breathing" occurs.
Reduce pressure to 35-50 PSI.
Use larger orifice.
Use a fast acrylic lacquer thinner.
|
| Print through (developed during mold building) transfers to mold. |
Putties, pastes and compounds under primer not fully cured.
Putties, pastes and compounds post-shrink with exposure to excessive exotherm
Exposure to excessive exotherm during mold building
|
Completely cure putties, pastes and compounds before priming.
Qualify putties, pastes and compounds for acceptable heat distortion temperatures.
Maintain exotherm below 200°F during mold building.
|


